Tony Lukasavage

Caffeine. Whiskey. Code. Mostly the last one.

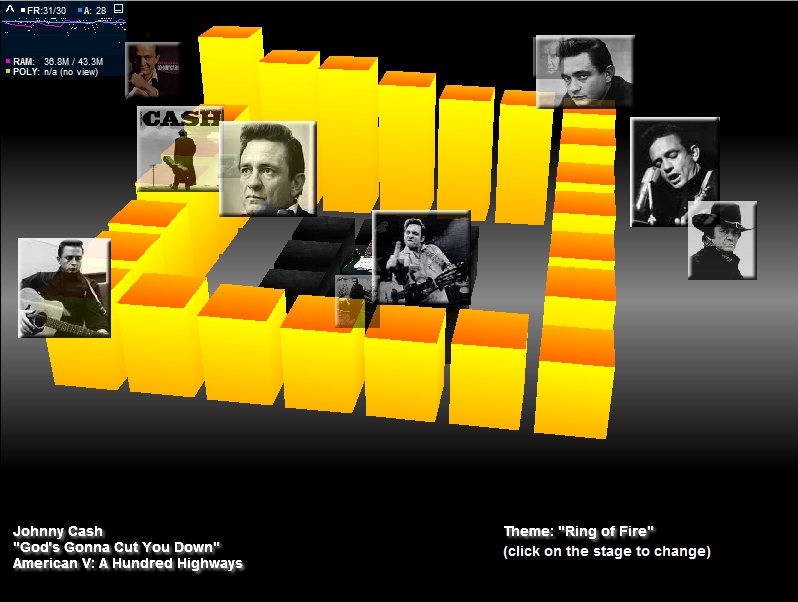
Johnny Cash in Flash

Click here or the image above for the demo. → View the source code. NOTE: You’ll need to download away3dlite, googleas3api, and AS3CoreLib to compile the code.

Inspired by the legendary Johnny Cash I decided to dive into a few AS3 development topics I haven’t gotten to yet to create a 3d equalizer and tribute to the Man in Black. Those topics, along with some other more familiar ones, include:

  • Playing audio in Flash with Sound and SoundChannel
  • Using the SoundMixer to generate values based on the audio
  • Searching for images with the Google API via googleas3api
  • Creating a PHP proxy for beating Flash cross-domain security issues
  • Using Away3dLite for speedy 3d visualization (I even get 15 FPS on my phone!)
  • Using Prefab to export 3d models as native AS3 code for Away3d or Away3dLite.

This demo has a good bit more code than I usually post up.  It also uses a couple external libraries, namely away3dlite (3d rendering), googleas3api (Google API), and AS3CoreLib (super useful AS3 utilities).  Rather than overwhelm you with mountains of tutorial-like rambling, instead I’ll leave this demo here to be enjoyed, make the source code available, and break down each of these topics into smaller tutorials/guides in the near future.

Sometimes your muse doesn’t need to be even slightly related to your field of creativity.  In fact, that can often make for the most interesting inspiration.

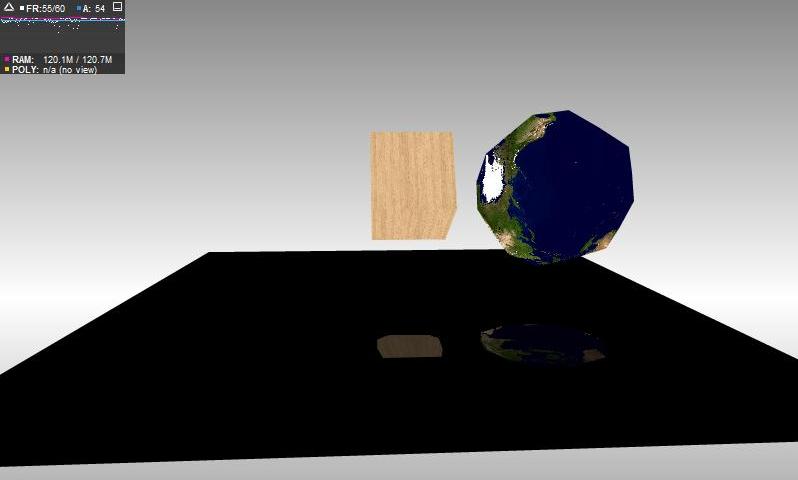
Reflection in Away3D, Take 2

About 13 seconds after I finished my last “Reflections in Away3D” demo I thought up a much better way to do it. I guess that’s what happens when you apply loosely applicable code to a new scenario. This method, while a bit more resource intensive, is MUCH more functional. Instead of doing a simple Bitmap inversion with a gradient mask and locking the view to only 2 out of 3 planes at a time, I use Away3D Plane objects and multiple views/cameras to create real-time reflections.  This is a 3D engine after all.

The revision I’m presenting here is just a proof of concept. In the near future I hope to release a class that encapsulates reflections much like SimpleShadow in Away3D. You’ll recognize SimpleShadow from the my Away3D shadows demo, which was written by the bad-ass Away3D dev and Prefab creator Fabrice Closier. Inspiration for this code definitely comes from his motivational work.  The reflections aren’t perfect, the overlapping isn’t perfect, but it does help to add a little more dimension to the scene.

UPDATE: Normally I would release the source code, but in my ignorance and zeal to get this done I totally missed the Away3D ReflectivePlane class.  It is designed to do exactly what this plane does using a lot more math, but only one additional camera/view per reflective plane.  It also does realistic reflections relative to the position of the viewing camera.  In other words, way better than what I was offering!

The only problem with ReflectivePlane is that it was designed a few Away3D revisions back and now has some intermittent initialization glitches.  It seemed to me to be better for the Away3d community that I try to recruit ReflectivePlane’s author, Alejandro Santander (AKA, “Li”), to help troubleshoot the problems rather than muddy the waters by adding another solution to an already solved scenario.  When we have a resolution to this problem, I’ll be sure to let you know… in the form of a demo WITH source code this time!

Video: Google Project, Flash Builder 4, and Subclipse

You’ll get to see exactly how to create a Google Project Hosting Subversion repository, install the Subclipse SVN plugin for Flash Builder 4, and integrate the repository into your development environment.

You’ll have to forgive the very amateur nature of the video, this was my first time using Adobe Captivate .  Its a pretty intuitive software, but I’m totally ignorant to the finer points of video guide creation.  I’m sure that will start to change in the near future, though, especially if people actually take the time to watch this one.

JigLib Flash and Away3D

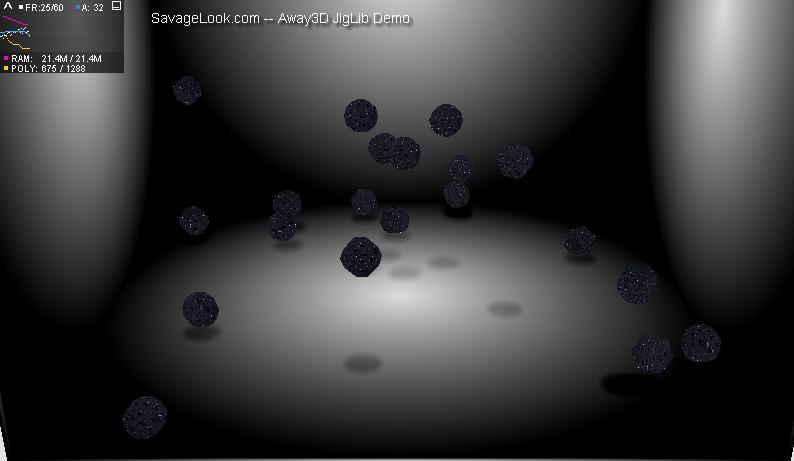
→ Click the above image or here to play the demo → View the source code

The Overview

Toying around with JigLib Flash in Away3D today was both interesting and sobering. For those who don’t know, JigLib is a 3D physics engine, and JigLib Flash is the AS3 port of it. While my expectations weren’t too high since this is complex mathematical processing in Flash, I was hoping for a little more. Don’t get me wrong, though, there’s some very cool potential here.  Be sure to check the tutorials and demos added by people who didn’t give up quite as quickly as me: JigLib Flash demos and tutorials.  I particularly enjoyed some of the car physics demos using this library.

I was setting out to do a basic Jenga-like game. Its just a tower of zig zagging blocks, 3 blocks to a row, 18 rows total. It quickly became evident that this just wasn’t going to happen. After about 4 rows of blocks the frame rate dropped down into single digits and there was tons of “jitter” among the blocks in the scene. I assume the jitter has to do with the fact that Flash can’t process the collisions fast enough and Jiglib is trying to correct rigid body penetrations. I did A LOT of tinkering with the JConfig settings, which are a group of static settings that manipulate how the physics is calculated, but couldn’t make it work for me. In the end, I think JigLib Flash just needs a lot of work on “stacking” and rigid bodies with many simultaneous points of contact.

OK, now that I’ve had my purge of frustration, let me at least talk about a half decent example of Away3D and JigLib running very well together. In the demo at the top of this post I just have a whole bunch of spheres falling into a box with JigLib taking care of the collisions. It works very well and even maintains a good frame rate. So good in fact that I even took the time to add some simple shadows to the falling spheres.

The Code

full source code (download link at bottom) jiglib_away3d.mxml:

1
2
3
4
5
6
7
8
9
10
11
12
13
14
15
16
17
18
19
20
21
22
23
24
25
26
27
28
29
30
31
32
33
34
35
36
37
38
39
40
41
42
43
44
45
46
47
48
49
50
51
52
53
54
55
56
57
58
59
60
61
62
63
64
65
66
67
68
69
70
71
72
73
74
75
76
77
78
79
80
81
82
83
84
85
86
87
88
89
90
91
92
93
94
95
96
97
98
99
100
101
102
103
104
105
106
107
108
109
110
111
112
113
114
115
116
117
118
119
120
121
122
123
124
125
126
127
128
129
130
131
132
133
134
135
<?xml version="1.0" encoding="utf-8"?>
<mx:Application xmlns:mx="http://www.adobe.com/2006/mxml" layout="absolute" xmlns:local="*"
              creationComplete="init();" frameRate="60" height="600" width="800"
              viewSourceURL="srcview/index.html">
    <mx:Script>
      <![CDATA[
          import away3d.primitives.Plane;
          import away3d.core.base.Mesh;
          import __AS3__.vec.Vector;
          import away3d.materials.BitmapMaterial;
          import jiglib.physics.RigidBody;
          import jiglib.plugin.away3d.*;
          import mx.core.UIComponent;
          import away3d.primitives.Sphere;
          import away3d.core.math.Number3D;
          import away3d.core.utils.Cast;

          private var _physics:Away3DPhysics;
          private var _shadows:Vector.<Plane> = new Vector.<Plane>();
          private var _bodies:Vector.<RigidBody> = new Vector.<RigidBody>();
          [Embed("shadow.png")] private var pngShadow:Class;
          [Embed("water.jpg")] private var jpgPaper:Class;

          private function init():void {
              if (stage) {
                  initAway3D();
              } else {
                  this.addEventListener(Event.ADDED_TO_STAGE, function(e:Event):void { initAway3D(); });
              }
          }

          private function initAway3D():void {
              stage.quality = flash.display.StageQuality.LOW;
              stage.scaleMode = StageScaleMode.NO_SCALE;
              _drawBackground();

              // prepare physics
              var walls:Vector.<RigidBody> = new Vector.<RigidBody>();
              _physics = new Away3DPhysics(away3dMain.view, 5);
              walls.push(_physics.createCube({width:1000, height:10, depth:1000}));
              walls.push(_physics.createCube({width:10, height:1000, depth:1000}));
              walls.push(_physics.createCube({width:1000, height:1000, depth:10}));
              walls.push(_physics.createCube({width:10, height:1000, depth:1000}));

              var sprite:Sprite = new Sprite();
              var matrix:Matrix = new Matrix();
              matrix.createGradientBox(512,512,0,0,0);
              sprite.graphics.beginGradientFill("radial", [0xdddddd,0x000000], [1,1], [0,255], matrix);
              sprite.graphics.drawRect(0,0,512,512);
              sprite.graphics.endFill();
              var bmd:BitmapData = new BitmapData(512,512,false);
              bmd.draw(sprite);
              var mat:BitmapMaterial = new BitmapMaterial(bmd);

              for (var j:uint = 0; j < walls.length; j++) {
                  var body:RigidBody = walls[j];
                  var mesh:Mesh = Away3dMesh(body.skin).mesh;
                  body.movable = false;
                  mesh.material = mat;
                  mesh.ownCanvas = true;
                  mesh.pushback = true;

                  switch(j) {
                      case 1:
                          body.x = 505;
                          body.y = 495;
                          break;
                      case 2:
                          body.z = 505;
                          body.y = 495;
                          break;
                      case 3:
                          body.x = -505;
                          body.y = 495;
                          break;
                  }
              }

              var paper:BitmapMaterial = new BitmapMaterial(Cast.bitmap(jpgPaper));
              for (var i:int = 0; i < 20; i++) {
                  var sphere:RigidBody = _physics.createSphere({radius:30, segmentsW:6, segmentsH:6});
                  _bodies.push(sphere);
                  sphere.x = 100 - Math.random() * 200;
                  sphere.y = 700 + Math.random() * 3000;
                  sphere.z = 200 - Math.random() * 100;
                  sphere.material.restitution = 1;

                  // This is how to access the engine specific mesh/do3d
                  _physics.getMesh(sphere).material = paper;

                  var plane:Plane = new Plane({material:new BitmapMaterial(Cast.bitmap(pngShadow)), height:80, width:80, bothsides:true});
                  plane.ownCanvas = true;
                  plane.pushback = true;
                  plane.filters = [new BlurFilter(8,8)];
                  plane.blendMode = BlendMode.SUBTRACT;
                  away3dMain.view.scene.addChild(plane);
                  _shadows.push(plane);
              }

              // create away3d scene
              away3dMain.title = "SavageLook.com -- Away3D JigLib Demo";
              away3dMain.camera.position = new Number3D(0, 700, -1500);
              away3dMain.camera.lookAt(new Number3D(0,0,0));

              // assign pre and post render functions
              away3dMain.preRender = function():void {
                  for (var k:uint = 0; k < _shadows.length; k++) {
                      if (_shadows[k].x > 505 || _shadows[k].x < -505 || _shadows[k].z > 505 || _shadows[k].z < -505 || _bodies[k].y < -10) {
                          _shadows[k].visible = false;
                      } else {
                          _shadows[k].x = _bodies[k].x;
                          _shadows[k].z = _bodies[k].z;
                      }
                  }
                  _physics.step();
              };
              away3dMain.postRender = function():void { trace("postRender"); };
          }

          private function _drawBackground():void {
              var sprite:Sprite = new Sprite();
              var ui:UIComponent = new UIComponent();
              var matrix:Matrix = new Matrix();

              matrix.createGradientBox(this.width, this.height, Math.PI/2, 0, 0);
              sprite.graphics.beginGradientFill("linear", [0x888888, 0xffffff], [1,1], [0,255], matrix);
              sprite.graphics.drawRect(0, 0, this.width, this.height);
              sprite.graphics.endFill();
              ui.addChild(sprite);
              this.addChildAt(ui, 0);
          }
      ]]>
    </mx:Script>
  <local:AwayUIC id="away3dMain"  x="0" y="0" height="600" width="800"/>
</mx:Application>

AwayUIC.mxml:

1
2
3
4
5
6
7
8
9
10
11
12
13
14
15
16
17
18
19
20
21
22
23
24
25
26
27
28
29
30
31
32
33
34
35
36
37
38
39
40
41
42
43
44
45
46
47
48
49
50
51
52
53
54
55
56
57
58
59
60
61
62
63
64
65
66
67
68
69
70
71
72
73
74
75
76
77
78
79
80
81
82
83
84
85
86
87
88
89
90
91
92
93
94
95
96
97
98
99
100
101
<?xml version="1.0" encoding="utf-8"?>
<mx:UIComponent xmlns:mx="http://www.adobe.com/2006/mxml" width="100%" height="100%">
  <mx:Script>
      <![CDATA[
          import away3d.debug.AwayStats;
          import away3d.core.math.Number3D;
          import away3d.cameras.TargetCamera3D;
            import away3d.containers.View3D;
            import away3d.core.render.Renderer;

            public var view:View3D;
            public var camera:TargetCamera3D;
            public var doRender:Boolean;
            private var _title:String;
            private var _link:String;
            private var _titleText:TextField;

            public var preRender:Function = null;
            public var postRender:Function = null;

            override protected function createChildren():void {
                super.createChildren();
                doRender = true;

                // setup camera
                camera = new TargetCamera3D();
                camera.position = new Number3D(0, 0, -1000);
              camera.lookAt(new Number3D(0,0,0));

                // setup view
                view = new View3D({camera:camera, renderer:Renderer.BASIC});
                view.x = this.unscaledWidth/2;
                view.y = this.unscaledHeight/2;
                this.addChild(view);

                // add stats and title
                var stats:AwayStats = new AwayStats(view);
                this.addChild(stats);
                _title = "SavageLook.com";
                _link = "http://savagelook.com/blog";
                _setText();

                this.addEventListener(Event.ENTER_FRAME, function(e:Event):void { _render(); });
            }

            private function _setText():void {
              if (_titleText == null) {
                  _titleText = new TextField();
                  this.addChild(_titleText);
              }

                _titleText.text = _title;
                _titleText.setTextFormat(new TextFormat("arial", 14, 0xffffff, false, false, false, _link));
                _titleText.x = 150;
                _titleText.y = 10;
                _titleText.width = _titleText.textWidth * 1.1;
                _titleText.filters = [new DropShadowFilter()];
            }

            public function get link():String {
              return _link;
            }

            public function set link(value:String):void {
              _link = value;
              _setText();
            }

            public function get title():String {
              return _title;
            }

            public function set title(value:String):void {
              _title = value;
              _setText();
            }

            override protected function updateDisplayList(unscaledWidth:Number, unscaledHeight:Number):void {
                super.updateDisplayList(unscaledWidth, unscaledHeight);
                view.x = unscaledWidth/2;
                view.y = unscaledHeight/2;

                if (view.stage) {
                  _render();
              }
            }

            private function _render():void {
              if (doRender) {
                  if (preRender != null) {
                      preRender();
                  }
                  view.render();
                  if (postRender != null) {
                      postRender();
                  }
              }
            }
        ]]>
  </mx:Script>
</mx:UIComponent>

The Summary

My hasty opinion in this case is that JigLib is fun to play with, but don’t get excited about doing anything super complex… yet.  I follow a few of the developers and contributors and they are constantly working on it.  They even just recently added support for Away3dLite so you can use all that quick rendering goodness along with it.  I fully intend to follow this project closely as it matures.

Reflection in Away3D

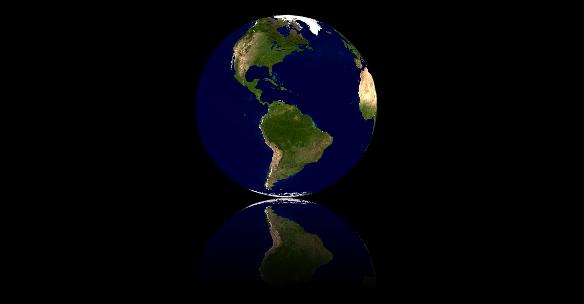
Click here or the image above for the reflection demo → View the source code

I alluded to a desire to implement reflections in Away3D in my prior post on reflections in AS3. Well here it is. It wasn’t quite as easy of a translation as I thought it would be, but with lots of digging through the Away3D dev list, as well as spotting a good example at geepers.co.uk, I managed to get a basic demo up and running.

While there’s a good bit of code that goes into this demo, the secret sauce is right here:

1
2
3
4
5
6
// must render before making the following calls
_view.render();

// find 2d bounding box of sphere
_drawn = (_view.session.getContainer(_view) as DisplayObjectContainer).getChildAt(0);
_bounds = _drawn.getRect(this);

What this code does is give us the DisplayObject that contains our 3D object within the given view. We are also able to determine the bounds of the DisplayObject and its 2 dimensional position within the view. With this information we are able to effectively create a snapshot of the visible 3d object. From there we need to create BitmapData that is the inverse of the DisplayObject. To do that we apply the appropriate matrix (invert the y scale) to the DisplayObject when it is drawn to BitmapData. After that we assign the BitmapData to the display Bitmap and then position it according to the bounds of the DisplayObject.

1
2
3
4
5
6
7
// redraw reflection
_bmd = new BitmapData(_drawn.width, _drawn.height, true, 0x00ffffff);
_matrix.createBox(_xscale, -_yscale, 0, _drawn.width/2, _drawn.height * _yscale / 2);
_bmd.draw(_drawn, _matrix);
_bitmapReflect.bitmapData = _bmd;
_bitmapReflect.x = _bounds.x;
_bitmapReflect.y = stage.stageHeight / 2 + _distance;

Finally we create an alpha gradient mask that will be applied to the Bitmap in order to give it that cool, fading reflection look.

1
2
3
4
5
6
7
8
// redraw gradient mask for reflection
_matrix.createGradientBox(_bitmapReflect.width, _bitmapReflect.height * _yscale / 2, Math.PI / 2, 0, 0);
_bitmapReflectGradient.graphics.clear();
_bitmapReflectGradient.graphics.beginGradientFill("linear", [0xffffff, 0xffffff], [0.9, 0], [0, 255], _matrix);
_bitmapReflectGradient.graphics.drawRect(0, 0, _bitmapReflect.width, _bitmapReflect.height);
_bitmapReflectGradient.graphics.endFill();
_bitmapReflectGradient.x = _bitmapReflect.x;
_bitmapReflectGradient.y = _bitmapReflect.y;

And there you go, reflections in Away3D. There are a number of limitations to this method, though:

  • It can only draw reflections of objects currently visible in the view.  In fact, there should be a check on the (_view.session.getContainer(_view) as DisplayObjectContainer).getChildAt(0) call to make sure that the view contains any children.
  • The reflection is drawn of the entire view, not just the object in question.  That’s why this works best with only one object in the view.  You can use multiple views to get reflections for multiple objects.
  • This example only does reflections of the view as its manipulated along the X & Y planes.  Moving the object along the Z plane will not effect the reflection properly.  I’m sure a method utilizing planes could do better.

If those limitations don’t bother you, then go to town. If they do, be patient. I’m working on another idea for reflection in Away3D that will be a lot more flexible, though more complex and processor intensive.

Remember how my previous blog post on shadows (of course you do) showed how you can easily enhance the 3D feel of your site? Of course you do. Now you can add reflections to that repetoire. It’s all about subtle changes to give your work a more polished look and feel. Have fun and let me know if you create reflections this way, or if you have an implementation of your own.

Reflection in AS3

Inspired by this tutorial on reflections in AS3 at adobe devnet, I decided to play with reflections in Actionscript3. As usual I can never follow a tutorial or step by step process without constantly trying to tweak it.

In my process of tweaking I found a slight short coming in the example given. While it does a fantastic job of handling standard DisplayObjects, I found that things get a little messed up when you add filters to these objects. Notice how the edges of the first image are cut off and sharp, whereas the the second image that accounts for the filters’ impact on DisplayObjects’ dimensions looks smooth:

In my efforts to remedy this problem I came across a very useful function for BitmapData called generateFilterRect(). Given a Rectangle and a BitmapFilter this function will return the Rectangle that would actually encompass the DisplayObject along with its filter. With a simple bit of iteration we can traverse an object’s list of filters and determine what the max dimensions will be. Here’s the function I added to take care of it:

1
2
3
4
5
6
7
8
9
10
11
12
13
14
15
16
17
18
19
20
21
private function _createReflectionBitmapData(obj:Sprite):BitmapData {
  var filterRect:Rectangle;
  var width:Number = obj.width;
  var height:Number = obj.height;
  var bmd:BitmapData = new BitmapData(width, height, true, 0xffffff);
  var matrix:Matrix = new Matrix();

  // filters can cause a display object to render outside of its rectangle
  for each (var filter:BitmapFilter in obj.filters) {
    filterRect = bmd.generateFilterRect(bmd.rect, filter);
    width = filterRect.width > width ? filterRect.width : width;
    height = filterRect.height > height ? filterRect.height : height;
  }

  // create, invert, and position relfection bitmapdata
  bmd = new BitmapData(width, height, true, 0xffffff);
  matrix.createBox(1, -1, 0, (width - obj.width)/2, height - (height - obj.height)/2);
  bmd.draw(obj, matrix);

  return bmd;
}

The end result is BitmapData that contains our inverted DisplayObject, now properly sized and positioned. We can now pass this into a Bitmap object and continue on with the code in the tutorial mentioned at the beginning of this post. Or… you can use my stripped down and less functional version to get a simple view of how reflections are achieved in AS3:

1
2
3
4
5
6
7
8
9
10
11
12
13
14
15
16
17
18
19
20
21
22
23
24
25
26
27
28
29
30
31
32
33
34
35
36
37
38
39
40
41
42
43
44
45
46
47
48
49
50
51
52
53
54
55
56
57
58
59
60
61
62
63
64
65
66
67
68
69
70
71
72
73
74
75
76
77
78
79
80
81
82
83
84
package
{
  import flash.display.Bitmap;
  import flash.display.BitmapData;
  import flash.display.DisplayObject;
  import flash.display.Sprite;
  import flash.events.Event;
  import flash.filters.BitmapFilter;
  import flash.filters.GlowFilter;
  import flash.geom.Matrix;
  import flash.geom.Rectangle;

  /**
   * ...
   * @author Tony Lukasavage - SavageLook.com
   */
  public class Main extends Sprite
  {
    public function Main():void
    {
      if (stage) init();
      else addEventListener(Event.ADDED_TO_STAGE, init);
    }

    private function init(e:Event = null):void
    {
      removeEventListener(Event.ADDED_TO_STAGE, init);

      // create main glow circle
      var obj:Sprite = new Sprite();
      var matrix:Matrix = new Matrix();
      var radius:Number = 100;
      matrix.createGradientBox(radius*2, radius*2, Math.PI / 2);
      obj.graphics.beginGradientFill("linear", [0x888888, 0xffffff], [1, 1], [0, 255], matrix);
      obj.graphics.drawCircle(radius, radius, radius);
      obj.graphics.endFill();
      obj.x = stage.stageWidth / 2 - radius;
      obj.y = stage.stageHeight / 2 - radius*1.5;
      obj.filters = [new GlowFilter(0xffffff, 1, 20, 20, 2, 1)];
      this.addChild(obj);

      // create reflection
      var bmd:BitmapData = _createReflectionBitmapData(obj);
      var bitmapReflect:Bitmap = new Bitmap(bmd);
      bitmapReflect.x = stage.stageWidth / 2 - bitmapReflect.width/2;
      bitmapReflect.y = obj.y + radius*2;
      this.addChild(bitmapReflect);

      // create gradient for reflection
      var grad:Sprite = new Sprite();
      matrix.createGradientBox(bitmapReflect.width, bitmapReflect.height / 2, Math.PI / 2, 0, 0);
      grad.graphics.beginGradientFill("linear", [0xffffff, 0xffffff], [1, 0], [0, 255], matrix);
      grad.graphics.drawRect(0, 0, bitmapReflect.width, bitmapReflect.height);
      grad.x = bitmapReflect.x;
      grad.y = bitmapReflect.y;
      grad.cacheAsBitmap = true;
      bitmapReflect.cacheAsBitmap = true;
      bitmapReflect.mask = grad;
      this.addChild(grad);
    }

    private function _createReflectionBitmapData(obj:Sprite):BitmapData {
      var filterRect:Rectangle;
      var width:Number = obj.width;
      var height:Number = obj.height;
      var bmd:BitmapData = new BitmapData(width, height, true, 0xffffff);
      var matrix:Matrix = new Matrix();

      // filters can cause a display object to render outside of its rectangle
      for each (var filter:BitmapFilter in obj.filters) {
        filterRect = bmd.generateFilterRect(bmd.rect, filter);
        width = filterRect.width > width ? filterRect.width : width;
        height = filterRect.height > height ? filterRect.height : height;
      }

      // create, invert, and position relfection bitmapdata
      bmd = new BitmapData(width, height, true, 0xffffff);
      matrix.createBox(1, -1, 0, (width - obj.width)/2, height - (height - obj.height)/2);
      bmd.draw(obj, matrix);

      return bmd;
    }
  }
}

And thats the basics. If you want an in depth description of each step and how they are performed, I will again refer you to the terrific tutorial by Ben Pritchard. In the meantime, enjoy your new found knowledge and start putting it to use. Everyone else is. Seriously. Like every image anymore has a reflection under it. This is really starting to irk my “swim against the current” side. Oh well, nothing a glass of Jack can’t cure.

Is everyone doing this in Away3D? No? Well you can add me to the list soon ;)

Adobe Alchemy

Adobe Labs has a prerelease project called Alchemy, which allows you to compile C/C++ code into SWC libraries that are usable in your AS3 code. For a former C/C++ coder like myself, this is music to my ears, but those without that background might be wondering why the hell you would even bother. Well, there’s 2 major points to consider:

  • You’ll be able to use the existing mountains of C/C++ libraries in your AS3 without having to create a port.
  • To quote the Adobe Alchemy page:  (Its) ideally suited for computation-intensive use cases, such as audio/video transcoding, data manipulation, XML parsing, cryptographic functions or physics simulation, performance can be considerably faster than ActionScript 3.0…

Now before you go getting all excited to compile your favorite C/C++ library into an SWC, there are some things to consider:

  • The more OS and other library dependencies your compiling target has, the less likely it is to work.
  • This is a prerelease labs project, so expect bugs and lots of visits to the Alchemy forums.  This should probably not be used for production code.
  • Adobe has not made it clear whether or not they plan to continue development of Alchemy, or whether it will ever be rolled into an official release.

If that hasn’t scared you off I’d highly suggest going to the Alchemy project page to get your necessary downloads and then heading immediately to the “Getting Started” page to setup up your development environment.  See if you can get their basic stringecho.c program working.  Once you have built your environment and compiled your first SWC for use in your AS3 code, it’s time to actually build your own Alchemy version of a C/C++ library.  Here’s a few examples of libraries that have been successfully ported to AS3 via Alchemy:

Now remember how I said you would inevitably run into bugs?  Yeah, that’s gonna happen, it wasn’t just a maybe.  Well, here’s a list of bugs I’ve run into so far (in attempting to port IJG’s JPEG library) and what I had to do to work around them.  And by “work around them” I mean “what people on the Alchemy forums did to work around them.”

  • adl.exe stuck

    checking whether we are cross compiling... \
    $FLEX_HOME/bin/adl.exe c:\\cygwin/tmp/t35f0.0/app.xml \
    2> /tmp/adl.trace & echo $!
    Cygwin must installed at C:\cygwin because Swfbridge, which loads AIR apps on the fly during configure scripts, is hardcoded to reference C:\cygwin.

    If you are working on a Linux system and get a similar error, make sure that you can execute your $FLEX_HOME/bin/adl file successfully. The executable for the standard Flex 3.2 SDK does not include a valid Linux ADL, only Windows and Mac. For a Linux version, download the AIR SDK for Linux and use its ADL.
  • Bad regex in achack/gcc

    Compiler] Error #1084: Syntax error: expecting identifier before \
    leftbrace.
        91011.achacks.as, Ln 1, Col 18:
        package cmodule. {
    Change line 274 of $ALCHEMY_HOME/achacks/gcc in the following way:
    #if($o =~ /([^\.]*)/)
    if($o =~ /([^\/\.]+)(\..*)*$/)
    or just replace $ALCHEMY_HOME/achacks/gcc with this fixed version.
  • Missing asmachine.abc

    1
    2
    
    [Compiler] Error #1063: Unable to open file: \
    $ALCHEMY_HOME/avm2-libc/lib/asmachine.abc.
    
    Don’t compile shared libraries, only static. You can usually set this in a configure script using “–enable-shared=no –enable-static=yes”. You can also pass the “-static” option to gcc directly when compiling.

That’s the list so far, but I’m sure there’ll be more. When all else fails, be sure to check the your /tmp directory for log files. I hope its saves anyone reading this a few hours as thats how long it took me to track these all down as an Alchemy noob. If you have the brains, guts, and patience to churn out an Alchemy port of a C/C++ library, leave a comment and let me know about it. Hopefully if enough of us do some real head turning work with it Adobe will actually put some serious effort into an actual supported release. Keep your fingers crossed.

Box2DFlashAS3 v2.1a HelloWorld

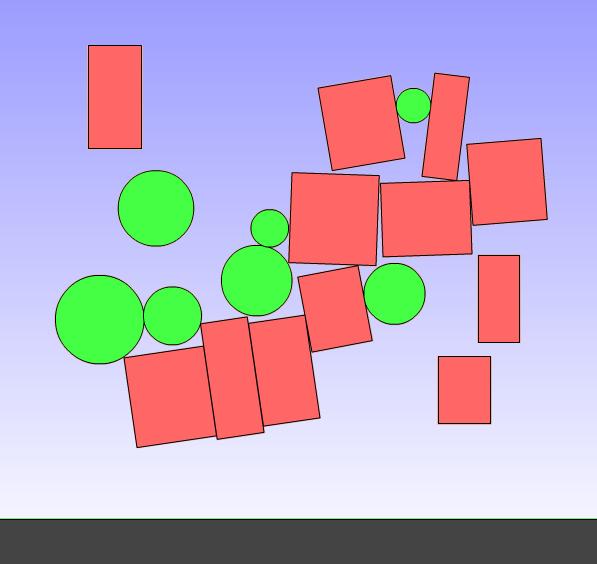
Click the image above for the demo. Click here or right click on the demo to view the source code.

Inspired by this clip of Box2D running on Android, I decided to dive into this 2D physics engine I have heard so much about.  While the version of Box2D I used is the AS3 version called Box2DFlashAS3, the original version is written in C++.  Basically it very simply lets you apply 2D physics to your objects, or “bodies,” in AS3.

Most of the examples and tutorials I saw were lacking 2 things:

  1. A way to apply sprites to my “bodies” without the use of a flash project (FLA) file.
  2. Code that was compatible with the latest version of Box2DFlashAS3, v2.1a at the time of this post.

So to resolve that situation, or to account for my search engine deficiency, I present the HelloWorld example from the Box2DFlashAS3 2.1a distribution modified to be pure AS3:

1
2
3
4
5
6
7
8
9
10
11
12
13
14
15
16
17
18
19
20
21
22
23
24
25
26
27
28
29
30
31
32
33
34
35
36
37
38
39
40
41
42
43
44
45
46
47
48
49
50
51
52
53
54
55
56
57
58
59
60
61
62
63
64
65
66
67
68
69
70
71
72
73
74
75
76
77
78
79
80
81
82
83
84
85
86
87
88
89
90
91
92
93
94
95
96
97
98
99
100
101
102
103
104
105
106
107
108
109
110
111
112
113
114
115
116
117
118
119
120
121
122
123
124
125
126
127
128
129
130
131
132
133
134
135
136
137
138
139
140
141
142
143
144
145
146
147
148
149
150
151
152
153
154
155
156
157
158
159
160
161
162
163
164
165
166
167
168
169
170
171
172
173
174
175
176
177
178
179
180
181
182
183
184
185
186
187
188
189
190
191
192
193
194
195
196
197
198
199
200
201
202
203
204
205
206
207
208
package {
  /*
   * Tony Lukasavage - SavageLook.com - 8/18/2010
   * Box2DFlashAS3 2.1a HelloWorld example, minus the need for an accompanying FLA
   *
   * This the basic Box2DFlashAS3 HelloWorld.as file from the source distribution
   * with some adjustments made so that you do not need an FLA file to compile and
   * run the code.  A simple bonus for us pure AS3 guys.  Also a few minor modifications
   * are made to account for changes between version 2.0 and 2.1, like adding a type
   * for body definitions.  Finally, I threw in an click handler to toggle between
   * normal and debug drawing.
   *
   */

  import Box2D.Collision.*;
  import Box2D.Collision.Shapes.*;
  import Box2D.Common.Math.*;
  import Box2D.Dynamics.*;

  import __AS3__.vec.Vector;

  import com.adobe.viewsource.ViewSource;

  import flash.display.Sprite;
  import flash.events.Event;
  import flash.events.MouseEvent;
  import flash.geom.Matrix;
  import flash.text.TextField;
  import flash.text.TextFormat;

  [SWF(width="800", height="600", frameRate="30")]
  public class box2d extends Sprite
  {
    private var _world:b2World;
    private var _velocityIterations:int = 10;
    private var _positionIterations:int = 10;
    private var _timeStep:Number = 1.0 / 30.0;
    private var _showDebug:Boolean = true;
    private var _debugSprite:Sprite;
    private var _bodySprites:Vector. = new Vector.();

    // Box2D uses meters for measurement, AS3 uses pixels.  1 meter = 30 pixels
    public var _worldRatio:int = 30;

    public function box2d()
    {
      // Add event for main loop
      addEventListener(Event.ENTER_FRAME, Update, false, 0, true);
      stage.addEventListener(MouseEvent.CLICK, onClick );

      // add background gradient
      var bg:Sprite = new Sprite();
      var matrix:Matrix = new Matrix();
      matrix.createGradientBox(stage.stageWidth, stage.stageHeight, Math.PI/2, 0, 0);
      bg.graphics.beginGradientFill("linear", [0x9999ff, 0xffffff], [1, 1], [0, 255], matrix);
      bg.graphics.drawRect(0, 0, stage.stageWidth, stage.stageHeight);
      bg.graphics.endFill();
      addChild(bg);

      // Define the gravity vector
      var gravity:b2Vec2 = new b2Vec2(0.0, 10.0);

      // Allow bodies to sleep
      var doSleep:Boolean = true;

      // Construct a world object
      _world = new b2World(gravity, doSleep);

      // set debug draw
      var debugDraw:b2DebugDraw = new b2DebugDraw();
      _debugSprite = new Sprite();
      addChild(_debugSprite);
      debugDraw.SetSprite(_debugSprite);
      debugDraw.SetDrawScale(_worldRatio);
      debugDraw.SetFillAlpha(0.5);
      debugDraw.SetLineThickness(2);
      debugDraw.SetAlpha(1);
      debugDraw.SetFlags(b2DebugDraw.e_shapeBit | b2DebugDraw.e_jointBit);
      _world.SetDebugDraw(debugDraw);

      // Vars used to create bodies
      var body:b2Body;
      var bodyDef:b2BodyDef;
      var boxShape:b2PolygonShape;
      var circleShape:b2CircleShape;

      // Adding sprite variable for dynamically creating body userData
      var sprite:Sprite;
      var groundHeight:int = 60;

      sprite = new Sprite();
      sprite.graphics.lineStyle(1);
      sprite.graphics.beginFill(0x444444);
      sprite.graphics.drawRect(-stage.stageWidth/2, -groundHeight/2, stage.stageWidth, groundHeight);
      sprite.graphics.endFill();

      bodyDef = new b2BodyDef();
      bodyDef.type = b2Body.b2_staticBody;
      bodyDef.position.Set(stage.stageWidth / _worldRatio / 2, (stage.stageHeight - sprite.height/2) / _worldRatio);
      bodyDef.userData = sprite;
      addChild(bodyDef.userData);

      boxShape = new b2PolygonShape();
      boxShape.SetAsBox(sprite.width/_worldRatio/2, sprite.height/_worldRatio/2);

      var fixtureDef:b2FixtureDef = new b2FixtureDef();
      fixtureDef.shape = boxShape;
      fixtureDef.friction = 0.3;
      fixtureDef.density = 0; // static bodies require zero density

      body = _world.CreateBody(bodyDef);
      body.CreateFixture(fixtureDef);

      // Add some objects
      for (var i:int = 1; i < 20; i++) {
        // create generic body definition
        bodyDef = new b2BodyDef();
        bodyDef.type = b2Body.b2_dynamicBody;
        bodyDef.position.x = Math.random() * 15 + 5;
        bodyDef.position.y = Math.random() * 10;
        var rX:Number = Math.random() + 0.5;
        var rY:Number = Math.random() + 1;
        var spriteX:Number = rX * 30 * 2;
        var spriteY:Number = rY * 30 * 2;

        // Box
        if (Math.random() < 0.5) {
          sprite = new Sprite();
          sprite.graphics.lineStyle(1);
          sprite.graphics.beginFill(0xff6666);
          sprite.graphics.drawRect(-spriteX/2, -spriteY/2, spriteX, spriteY);
          sprite.graphics.endFill();
          bodyDef.userData = sprite;

          boxShape = new b2PolygonShape();
          boxShape.SetAsBox(rX, rY);

          fixtureDef.shape = boxShape;
          fixtureDef.density = 1.0;
          fixtureDef.friction = 0.5;
          fixtureDef.restitution = 0.2;

          body = _world.CreateBody(bodyDef);
          body.CreateFixture(fixtureDef);
        }
        // Circle
        else {
          sprite = new Sprite();
          sprite.graphics.lineStyle(1);
          sprite.graphics.beginFill(0x44ff44);
          sprite.graphics.drawCircle(0, 0, spriteX/2);
          sprite.graphics.endFill();
          bodyDef.userData = sprite;

          circleShape = new b2CircleShape(rX);

          fixtureDef.shape = circleShape;
          fixtureDef.density = 1.0;
          fixtureDef.friction = 0.5;
          fixtureDef.restitution = 0.2;

          body = _world.CreateBody(bodyDef);
          body.CreateFixture(fixtureDef);
        }

        _bodySprites.push(bodyDef.userData as Sprite);
        addChild(bodyDef.userData);
      }

      // enable view source
      ViewSource.addMenuItem(this, "srcview/index.html");
      var text:TextField = new TextField();
      text.text = "Right click to view source";
      text.setTextFormat(new TextFormat("arial", 14, 0, true));
      text.x = 20;
      text.y = 20;
      text.width = 200;
      addChild(text);
    }

    public function onClick(e:MouseEvent):void {
      _showDebug = !_showDebug;
      if (!_showDebug) {
        _debugSprite.graphics.clear();
      }
      for each (var sprite:Sprite in _bodySprites) {
        sprite.visible = !_showDebug;
      }
    }

    public function Update(e:Event):void{
      _world.Step(_timeStep, _velocityIterations, _positionIterations);
      if (_showDebug) {
        _world.DrawDebugData();
      }

      // Go through body list and update sprite positions/rotations
      for (var bb:b2Body = _world.GetBodyList(); bb; bb = bb.GetNext()){
        if (bb.GetUserData() is Sprite){
          var sprite:Sprite = bb.GetUserData() as Sprite;
          sprite.x = bb.GetPosition().x * 30;
          sprite.y = bb.GetPosition().y * 30;
          sprite.rotation = bb.GetAngle() * (180/Math.PI);
        }
      }
    }
  }
}

Very cool stuff that adds lots of possibilities to your Flash projects.  I can’t wait to start playing with the more complex aspects like joints, buoyancy and breakable bodies.  More intensely awesome demos sure to follow.

ShadowBox JS for Wordpress

Just a quick update to let you know that my Flash demos will be from now on be displayed in ShadowBox.js via the ShadowBox JS Wordpress plugin.  Its a lightweight javascript library that allows you to show all kinds of media on your website in a slick popup window.  You’ve probably seen them before on video and image gallery sites.

While the ShadowBox JS plugin will handle all your images, videos, SWFs, etc… by default, I prefer to manually determine which media will utilize it.  And to do so, its as simple as adding “rel=shadowbox” to your anchor tags, which I use in my Box2D demo post:

1
2
3
4
5
6
7
<a rel="shadowbox;height=600;width=800;"
    href="http://savagelook.com/demos/box2d/box2d.swf"
    target="_self">
  <img class="  " title="Box2D demo"
         src="http://savagelook.com/images/box2d_full.jpg"
         alt="Box2D demo" width="516" height="487" />
</a>

I avoided pre-built blogs for the longest time because I’m a ridiculously customization driven programmer, but with what Wordpress has available for free, I wonder why I wasn’t using it all along.  I highly suggest ShadowBox.js for your Wordpress blog or any website that needs a little extra eye-catching flair.  And let’s face it, if you’ve been around my blog for any amount of time, it’s all about eye candy.

Webcam Video in Actionscript3

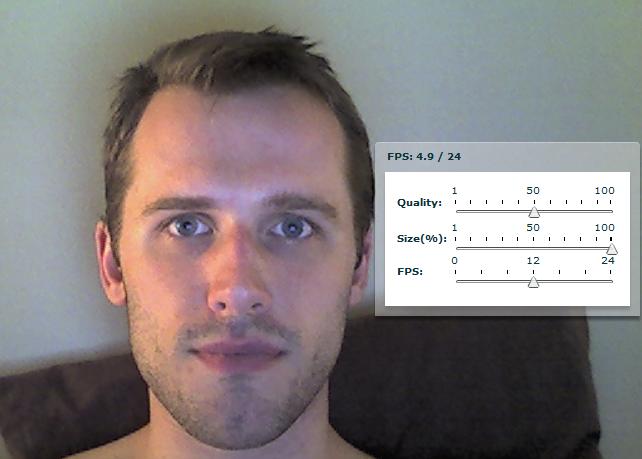
Click the above picture for the webcam demo (webcam required). Right click on the demo, or click here for the source code.

This is a pretty simple demo compared to some of my other stuff, but it’s a key point for a lot of them.  Knowing how to use the webcam independently of an existing library can open up lots of options beside augmented reality.  For that reason, I present this small demo showing off how easy it is to do so in Actionscript3.

Here’s a slightly modified excerpt from the full source code that is the meat and potatoes of the demo:

1
2
3
4
5
6
7
var camera:Camera = Camera.getCamera();
camera.setQuality(0,100);
camera.setMode(800,600,60,true);

var video:Video = new Video(800,600);
video.attachCamera(camera);
addChild(video);

As you can see, its as simple as creating a Camera object, attaching it to a Video object and adding the Video object to the main sprite.  The demo will show you how to manipulate image quality, camera frame rate, and viewport size.  For more details on all the properties and methods of each, check out the ASDocs on Camera and Video.

What can you do with this besides making yet another video chat application?  I don’t know about you, but I’m planning an Away3DLite project that will involve multiple levels of “reflection” based on the images from the webcam.  It will be awesome.  Now I just need to figure out how I’m going to do it.  Details…